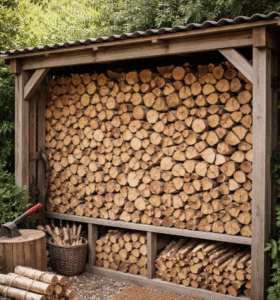
An Ecodesign wood-burning stove is engineered to burn fuel more efficiently and produce fewer emissions than an older stove. However, the appliance can only perform as intended when supplied with the right fuel, enough combustion air, and a properly established fire.
The lighting stage is especially important. A weak, smoky start leaves the firebox and chimney cold, encourages incomplete combustion and can blacken the stove glass. A well-built fire should establish quickly, warm the flue and create bright, active flames without producing unnecessary smoke.
For most modern wood-burning stoves, the top-down lighting method provides an effective way to achieve this. Instead of placing the firelighter beneath a pile of logs, the main logs form the base, with progressively smaller pieces of wood and the firelighter placed above them. The fire then burns downwards through the fuel.
Every stove and installation is different, so always read the appliance manufacturer’s operating instructions before lighting it. Air controls vary by model, and the manufacturer’s guidance should take priority over general advice. HETAS also recommends following the appliance-specific instructions because manufacturers may specify different lighting techniques to reduce smoke and make the stove easier to use.
What is an Ecodesign stove?
Ecodesign regulations set minimum efficiency and emissions requirements for solid-fuel local space heaters, including wood-burning stoves. The requirements for these appliances took effect from 1 January 2022.
An Ecodesign stove is designed to manage combustion air carefully so that more of the gases released by the wood burn inside the firebox. Depending on the model, this may involve primary air, secondary air, an airwash system and preheated tertiary air.
These features can support a cleaner, more efficient burn, but they cannot compensate for wet fuel, insufficient airflow, or poor operating practices. Correct lighting remains essential.
Why use the top-down lighting method?
In a conventional bottom-up fire, a firelighter or newspaper is placed beneath the kindling, with larger logs added above it. This can work, but the larger pieces of wood may begin releasing gases before the firebox and flue are hot enough to burn them efficiently.
A top-down fire reverses the arrangement:
Small logs form the base.
Kindling is arranged above the logs.
The firelighter is placed in the kindling.
The fire is lit from above.
Example of a top-down method shown on our Purevision 5kW stove:
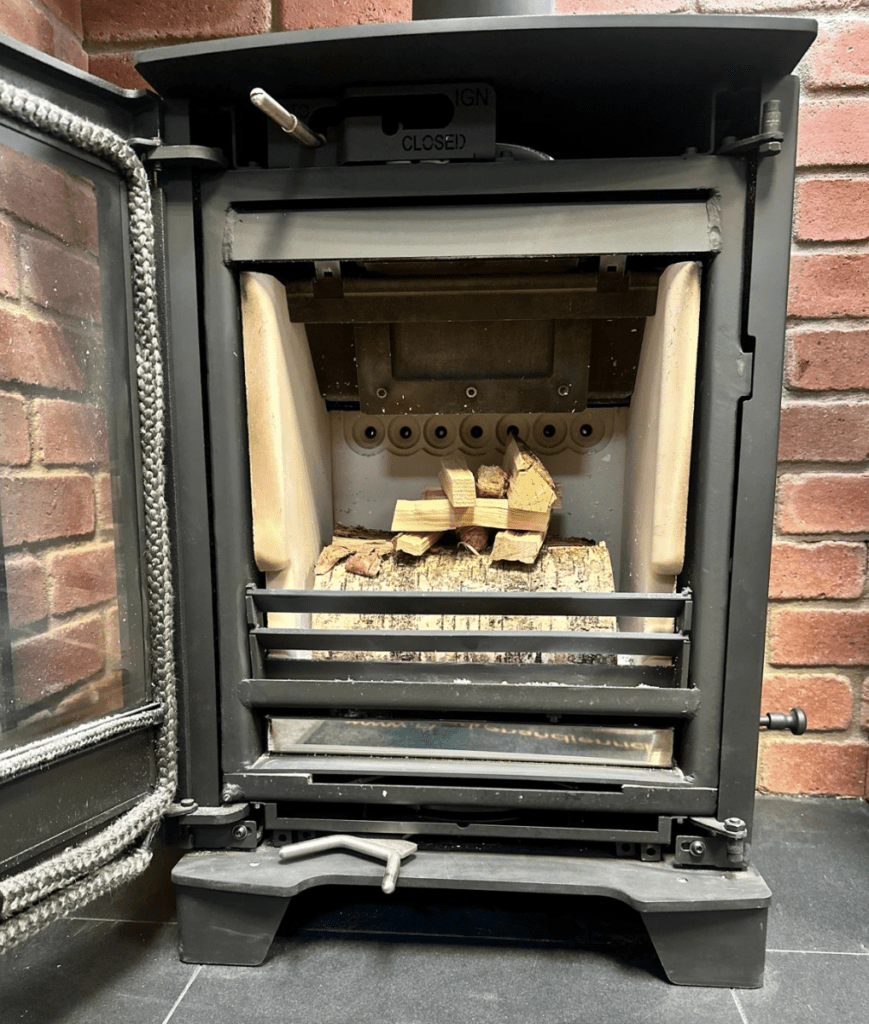
The first flames remain high in the firebox, helping to warm the flue and establish a reliable draught. As the kindling burns, it gradually chars and ignites the logs below. The method also reduces the need to open the door and add larger fuel immediately after lighting, which could otherwise cool the combustion chamber.
Below is a close-up picture:
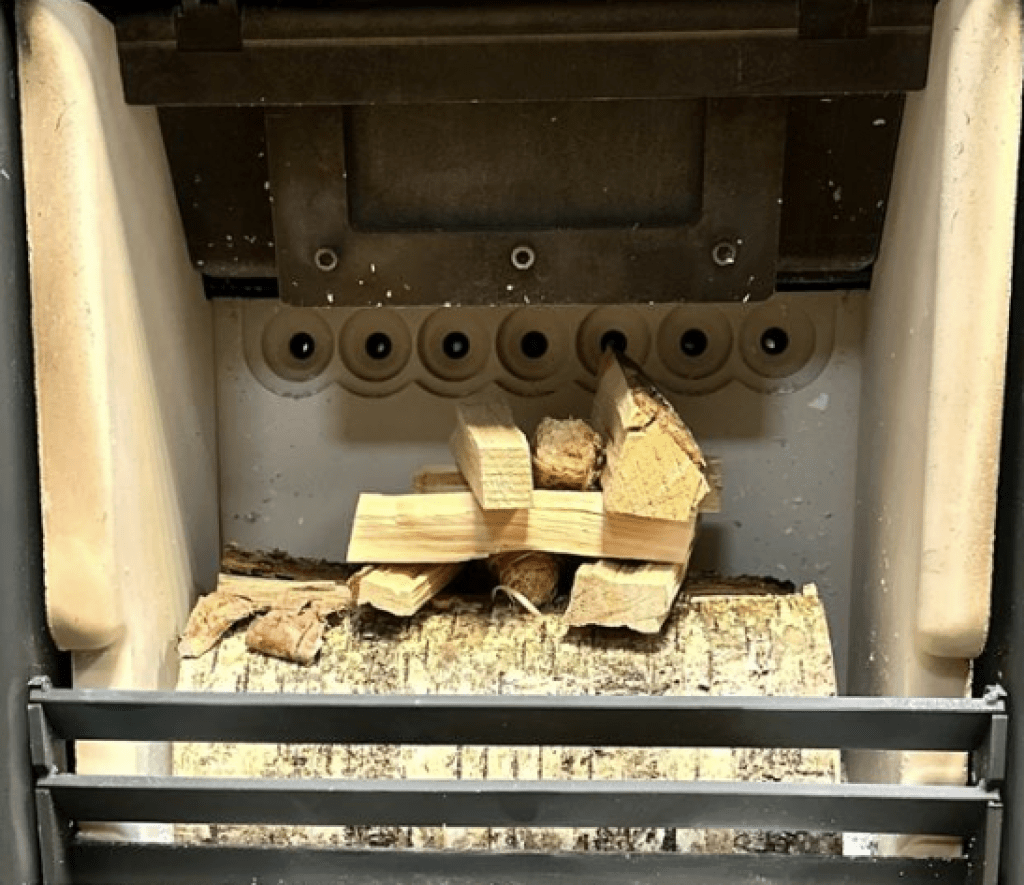
Top-down lighting helps the flue reach operating temperature quickly, while the logs underneath char and burn cleanly.
What you will need
Prepare everything before opening the stove door:
1. Two small or medium-sized split logs
2. A generous supply of dry kindling
3. One or two suitable firelighters
4. Long matches or a long-reach lighter
5. A stove glove
6. A poker or appropriate stove tool
7. The operating instructions for your stove
Use purpose-made firelighters that are suitable for a closed wood-burning stove. Never use petrol, paraffin, methylated spirits, barbecue lighter fluid or another flammable liquid to start or revive a fire.
Selecting the right firewood
The quality of the firewood has a major effect on how easily the stove lights. Wood intended for immediate use should contain no more than 20% moisture. In England, the Ready to Burn certification mark identifies qualifying firewood sold in smaller quantities that has a moisture content of 20% or less.
Wet wood wastes energy because part of the fire’s heat must first evaporate the water held in the logs. This cools the firebox, makes ignition more difficult and can produce more smoke, soot and tar. It may also blacken the stove glass and increase deposits inside the chimney.
Choose logs that:
1. Fit comfortably inside the firebox
2. Are split rather than left as large round sections
3. Feel relatively light for their size
4. Have been stored somewhere dry and ventilated
5. Meet the fuel specifications in the stove manual
Both hardwood and softwood can be suitable when properly dried. Dry softwood is often useful for kindling because it ignites quickly, while denser hardwood logs may provide a longer-lasting main fire. Moisture content matters more than whether the tree was classified as hardwood or softwood.
Do not burn painted, varnished, glued or pressure-treated timber. Avoid old furniture, MDF, chipboard, fence panels, construction waste, household rubbish and unidentified pallets. Treated waste wood and rubbish can release harmful fumes and toxic pollutants, and can damage the stove and flue.
Before lighting the stove
Check the firebox. The stove should be cold before you prepare it.
Remove excessive ash and any unburned debris that could obstruct the combustion-air openings. Many dedicated wood-burning stoves can operate with a thin, even bed of ash, but this depends on the appliance. Do not allow ash to build up against air inlets, the door opening or components that require cooling.
Check that:
1. The firebricks are correctly positioned.
2. The internal baffle or throat plate has not moved.
3. The door glass is intact.
4. The door rope seal appears secure.
5. The ash pan, where fitted, is not overfilled.
6. No combustible items have been placed on the hearth or against the stove.
If a component is damaged or incorrectly positioned, do not use the stove until it has been checked. Confirm that the room has enough ventilation. A wood-burning stove needs a continuous supply of air. Do not block a permanent air vent installed for the appliance.
Extractor fans, cooker hoods and other ventilation equipment can sometimes affect the pressure within a building. If the stove regularly struggles to establish a draught or smoke enters the room, stop using it and ask a competent installer or chimney professional to investigate.
Check the carbon monoxide alarm. Make sure the carbon monoxide alarm is present, powered and working – especially if you’re using the stove for the first time or at the very start of the season. Test it according to the alarm manufacturer’s instructions. Carbon monoxide cannot be seen, smelled or tasted. A functioning alarm is therefore an essential safeguard. Government guidance recommends installing a carbon monoxide monitor when using a stove or open fire.
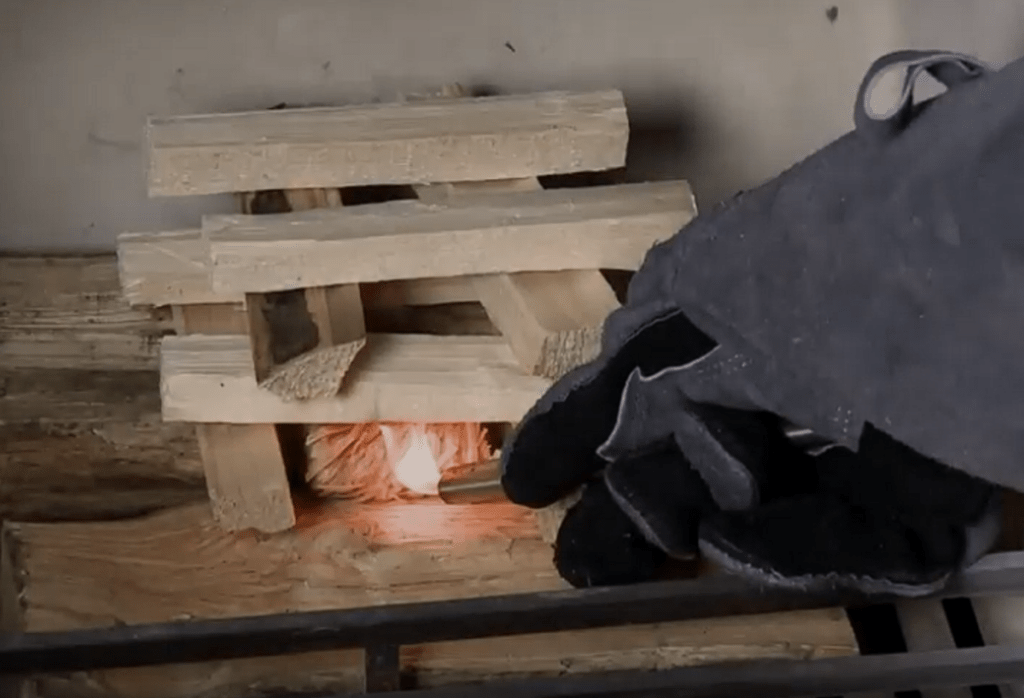
How to build a top-down fire
Step 1: Set the air controls to the lighting position.
Place the stove’s combustion-air controls in the position specified for lighting. On some appliances, this means opening a single control fully. Other models have separate primary and secondary controls. Do not assume that every lever should be moved in the same direction or left fully open for the same length of time. The correct lighting position should be shown in the stove manual.
Step 2: Place two small logs on the fire bed
Lay two dry, split logs across the fire bed. Leave a space between them so air can move around the fuel. The logs should be small enough to catch from the kindling without requiring a prolonged, smoky heating period. Avoid beginning with the largest logs that will physically fit inside the stove. Oversized fuel can be slow to ignite and may suppress the developing fire.
Step 3: Add the first layer of kindling
Place approximately four to six pieces of dry kindling across the two logs. Space them apart rather than creating a solid wooden platform. Combustion air must be able to pass through the structure.
Step 4: Build a second layer at right angles
Add another layer of kindling at approximately 90 degrees to the first. This creates a loose criss-cross structure with air gaps between the pieces. If the firebox is large enough, add a third layer of finer kindling above it. Do not pack the kindling tightly. A fire needs both fuel and oxygen.
Step 5: Position the firelighter
Place one or two suitable firelighters between or immediately beneath the uppermost pieces of kindling. The firelighter should be high enough in the structure for the flames to begin near the top, while still being surrounded by enough fine, dry wood to sustain ignition. HETAS’s top-down method similarly uses two small logs at the bottom, crossed layers of kindling and firelighters positioned within the upper structure.
Step 6: Light the firelighter
Light the firelighter using a long match or lighter, keeping your sleeves and hands clear of the firebox. Once it has ignited, close the stove door unless the manufacturer specifically instructs you to leave it slightly ajar for a short period. Never leave the stove unattended with its door open.
Do not repeatedly open the door to adjust the kindling. Give the fire time to establish.
Step 7: Allow the kindling to burn strongly
The flames should spread through the upper kindling and gradually work down towards the logs. During this stage, leave the air controls in the lighting position for the period specified by the manufacturer.
The aim is to:
1. Establish strong flames
2. Warm the firebox
3. Heat the flue
4. Develop a reliable chimney draught
5. Char the surfaces of the lower logs
Avoid turning the stove down simply because the kindling appears lively. Closing the air supply too soon can cool the fire, create smoke and prevent the main logs from igniting properly.
Step 8: Adjust the air controls gradually
Once the kindling is well alight, the stove is warming, and the lower logs have begun to char and burn, move the controls towards their normal operating positions.
Make the adjustment gradually.
A modern wood-burning stove should normally retain visible, active flames. Closing the controls until the logs merely glow or smoulder is not an efficient way to extend the burn. Starving the fire of air encourages incomplete combustion, increased deposits and higher emissions.
The exact control setting will depend on:
1. The stove model
2. The chimney draught
3. The size and moisture content of the logs
4. The stage of the burn
5. Weather conditions
6. The heat required in the room
Use the stove manual as your primary guide and learn how your particular installation responds.
What should a well-established fire look like?
A properly established wood fire will normally have:
1. Bright, active flames
2. Logs that are visibly charred
3. A warm firebox
4. Little or no persistent visible smoke from the chimney
5. A stable fire that does not repeatedly fade
6. Glass that remains reasonably clear
Our double-sided Woodtec 8kW with a perfect flame picture.
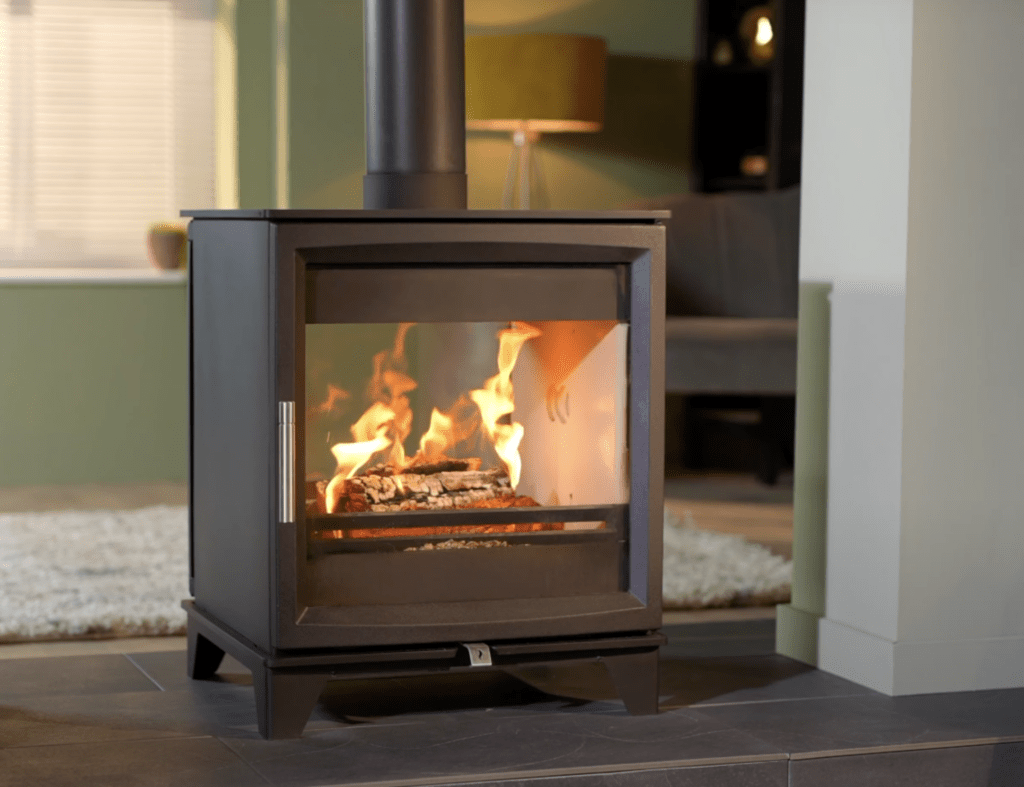
Some temporary misting or darkening of the glass can occur during a cold start, particularly around the edges. Persistent heavy blackening usually indicates wet fuel, insufficient combustion air, oversized logs, poor chimney draught or repeated low-temperature burning. The objective is not to create the largest possible flames. It is to establish controlled, complete combustion at the operating rate recommended for the stove.
How to add more logs:
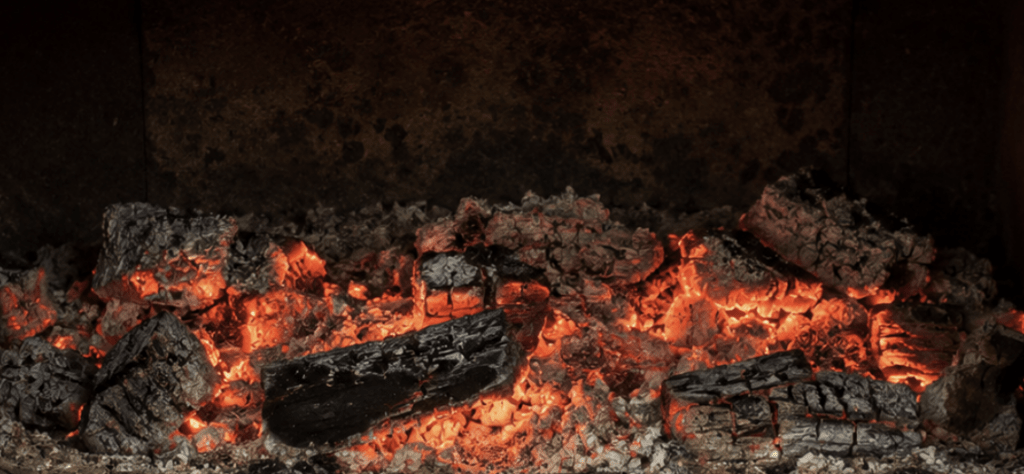
Wait until the initial logs have burned down sufficiently to leave a hot bed of glowing embers. Prepare the replacement logs before opening the door. Put on the stove glove and follow this sequence:
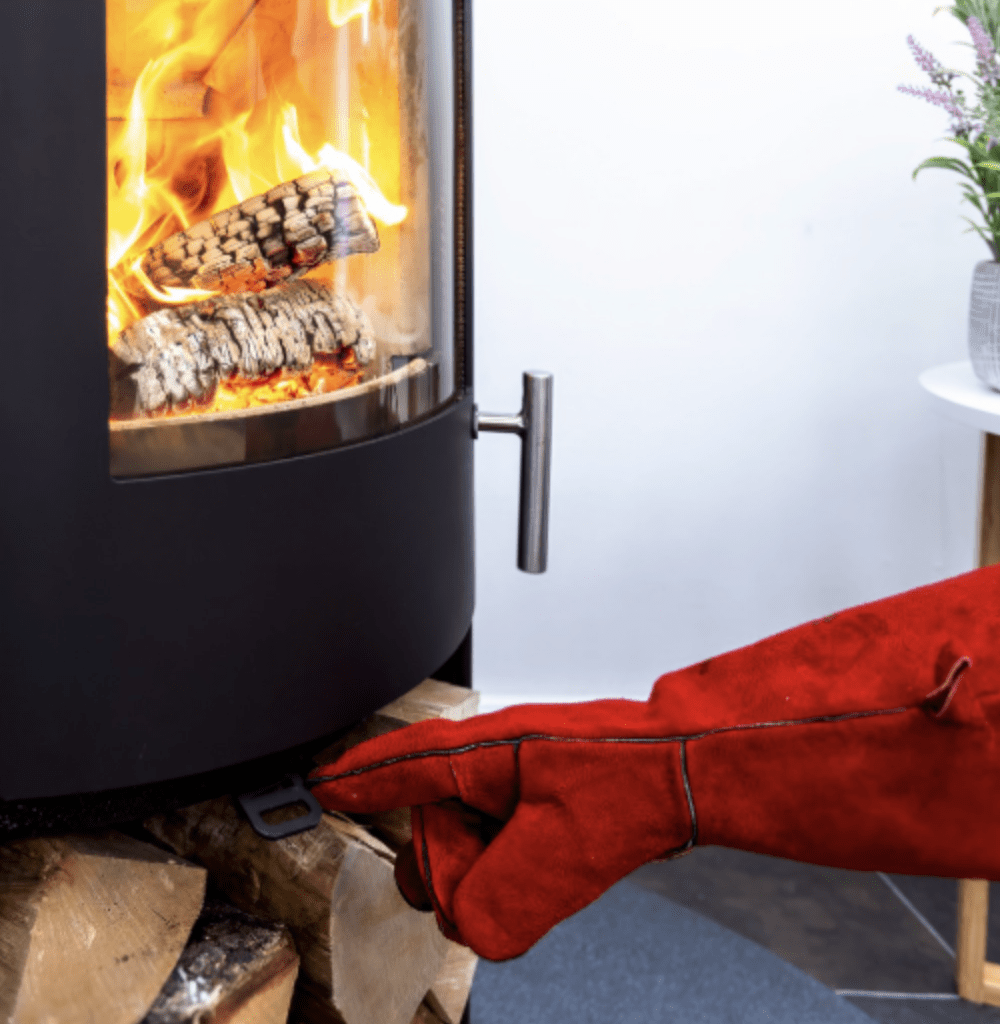
1. Move the air control to the manufacturer’s refuelling or high-burn position.
2. Open the door by a small amount.
3. Pause for a few seconds so the pressure can equalise.
4. Open the door slowly.
5. Place one or two dry logs onto the hot embers.
6. Leave space around the logs for air circulation.
7. Close and secure the door.
8. Allow the new fuel to burn strongly and become charred.
9. Return the controls gradually to the normal operating position.
Opening the door slowly reduces the likelihood of smoke being drawn into the room.
Refuelling on glowing embers, avoiding overloading and allowing the new fuel to burn at a high rate before reducing the air supply is ideal. Do not repeatedly fill the entire firebox. Loading more wood than the manufacturer recommends can cause over-firing, excessive temperatures and damage to the stove, chimney or surrounding materials.
11 Common lighting mistakes
1. Using wet logs – Wet wood is harder to ignite, produces less useful heat and can cause excessive smoke and deposits. Use wood with a moisture content of 20% or less. Keep it raised from the ground and protected from rain while allowing ventilation around the stack.
2. Using too little kindling – A single firelighter underneath two large logs is unlikely to produce enough sustained heat for clean ignition.
3. Use several pieces of dry kindling arranged with generous air gaps.
4. Packing the fuel too tightly
5. An overfilled firebox restricts airflow and can prevent flames from developing.
6. Build a stable but open structure.
7. Closing the air controls too early. The stove may appear to be burning well while only the kindling is alight. If you reduce the air supply before the main logs have charred, the fire may reduce into a smoky smoulder.
8. Wait until the logs are burning properly.
9. Leaving the controls fully open for too long. Once the fire is established, excessive combustion air may cause the fuel to burn too quickly and could contribute to over-firing. Move the controls to the normal operating setting specified by the manufacturer.
10. Adding a large log to a weak fire. A large, cold log can overwhelm a small flame and lower the firebox temperature. If the ember bed is weak, rebuild it first with a small quantity of dry kindling.
11. Burning overnight at a very low setting. Do not deliberately shut the air controls down in an attempt to keep a wood fire smouldering until morning unless the appliance is specifically designed and approved for that mode of operation. Prolonged low-output burning can lead to incomplete combustion, increased carbon monoxide and particulates, creosote deposits and a cooling chimney with insufficient draught. It is usually better to allow the fire to finish safely and light a fresh fire when heat is next required.
Troubleshooting a difficult fire
Issue – The firelighter burns out without igniting the kindling
Possible causes include:
1. Damp kindling
2. Pieces that are too thick
3. Insufficient airflow
4. Kindling packed too tightly
Allow the stove to cool if necessary, rebuild the structure with finer dry kindling and check that the air controls are in the correct lighting position.
Issue – The kindling burns, but the logs do not ignite.
The base logs may be too large, too wet or too tightly positioned. Use smaller split logs and leave more space for air. Do not add further large fuel until the fire is strong enough to support it.
Issue – The glass turns black quickly. Common causes include wet fuel, low firebox temperature, insufficient air, oversized logs or operating the stove at a very low rate. Allow the stove to burn at the correct temperature using dry wood. Do not try to clean hot glass.
Issue – The logs burn too quickly.
Check that the door is properly closed and that the controls have been moved from the lighting position to the normal setting. A very strong chimney draught or a damaged door seal can also cause unusually rapid burning. If the stove remains difficult to control, arrange for it to be inspected.
Issue – Smoke enters the room.
A properly installed and correctly operating stove should not routinely release smoke into the room. Close the stove door and make sure the air controls are set safely. Ventilate the room where appropriate. Do not repeatedly open the door or add fuel.
Possible causes include:
1. A cold or obstructed chimney
2. Insufficient ventilation
3. A blocked air vent
4. An extractor fan affecting room pressure
5. Adverse weather conditions
6. A damaged or incorrectly fitted baffle
7. A chimney that requires sweeping
8 A fault with the installation
If smoke spillage continues, stop using the stove and contact a competent installer or qualified chimney sweep. If the carbon monoxide alarm activates, leave the property, seek fresh air and follow the alarm manufacturer’s emergency instructions. Do not use the appliance again until the cause has been identified and corrected.

Essential Tip – Maintain your stove and chimney
Clean burning depends on more than the lighting method. Have the stove serviced at suitable intervals and inspect components such as the door seals, baffle, firebricks and air controls. The manufacturer may specify an annual service.
The chimney must also be swept regularly. We recommend sweeping chimneys for wood-burning stoves at least three times a year, generally before the heating season, mid-season, and again after the main period of use before spring. The appropriate frequency may vary according to the fuel, appliance and intensity of use.
Regular sweeping removes soot and deposits that can restrict the flue, reduce performance and increase the risk of a chimney fire.
A cleaner fire begins with a good start
Lighting an Ecodesign wood-burning stove successfully is largely a matter of preparation. Use properly dried fuel. Build an open top-down structure. Give the kindling enough air to establish a strong flame. Allow the stove and chimney to warm before reducing the controls, and add new logs only when a healthy ember bed has formed.
Most importantly, operate the stove according to its manual. Ecodesign technology can support cleaner, more efficient combustion, but results still depend on the fuel placed inside the appliance and how the fire is managed.
A few extra minutes spent building and establishing the fire correctly can mean easier lighting, clearer glass, more useful heat and less unnecessary smoke.