Chimney fires are one of those household hazards that can be dramatic and unpredictable, until you look at the science and the patterns behind them. In most cases, they don’t just happen. They’re the end result of a slow build-up of combustible deposits inside a flue, usually caused by bad burning practices, wet fuel, and neglected maintenance.
The good news is that chimney fires are largely preventable. A proactive routine, regular chimney sweeping, burning only properly seasoned wood, and using (and correctly operating) a modern Ecodesign stove can dramatically reduce both the likelihood and severity of a chimney fire.

What is a chimney fire?
A chimney fire is the ignition of combustible material inside your chimney or flue system. That material is usually creosote (tar), soot, or a mixture of both that accumulates when wood smoke cools and condenses on the flue walls.
Chimney fires can be:
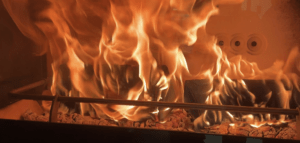
Fast and loud: a roaring sound, sparks or flames shooting from the chimney top with intense heat.
Slow and quiet: a smouldering burn of deposits that may not announce itself dramatically but can still crack liners, damage masonry, or start hidden fires in roof spaces.
Both types are dangerous. Even a small chimney fire can compromise the chimney structure and increase the risk of a house fire later.
The real fuel behind chimney fires: creosote (tar)
Most chimney fires are essentially deposit fires. The deposit is creosote, a catch-all term for the sticky, tarry, carbon-rich compounds that form from wood smoke.
Creosote tends to appear in stages:
Stage 1: Fluffy soot / light creosote, Grey/brown, dusty or flaky. Easier to sweep
Stage 2: Crunchy, thicker deposits. Dark, granular, often brittle. Harder to remove
Stage 3: Glazed creosote. Hard, shiny, sometimes like black enamel. Highly combustible and difficult to remove – often needing specialist treatment
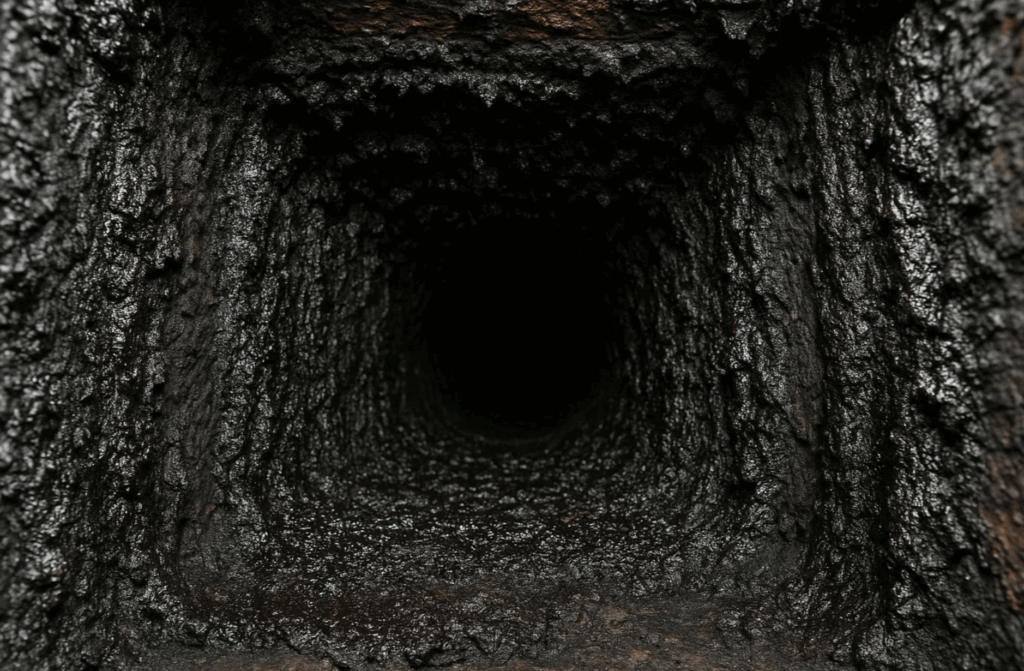
The more your system encourages smoky, cool flue conditions, the more likely you are to develop thick or glazed creosote. Below is what a congested flue can look like:
Why creosote forms: the combustion science in plain terms
To understand prevention, it helps to understand what’s happening inside a stove and chimney. Wood doesn’t just burn; it goes through several stages. When you light a log, it typically goes through:
1. Drying (evaporation of moisture)
2. Pyrolysis (thermal breakdown of wood)
3. Flaming combustion (burning of released gases)
4. Charcoal combustion (burning of solid carbon-rich char)
Wood is mainly cellulose, hemicellulose, and lignin. When heated, these break down and release a complex mix of flammable gases, water vapour, and condensable organic vapours (tars). If those vapours don’t burn fully in the firebox due to low temperature, insufficient oxygen, or poor mixing, they leave as smoke. When that smoke cools in the flue, the heavier organic compounds condense and stick to the chimney walls as tar/creosote.
Condensation is the silent culprit
Think of the chimney like a cold window on a winter day: warm, moist air hits a cold surface, and water condenses. In a flue, it’s similar, except it’s not just water. It’s water plus tarry organics. That sticky film grabs soot, thickens, and can harden into a glaze over time. So creosote build-up is strongly driven by unburned vapours leaving the stove and by cool flue surfaces, which promote condensation.
Why chimney fires happen: the main causes
Chimney fires generally come from a combination of the following:
1) Burning wet or unseasoned wood – This is one of the biggest risk factors. Burning unseasoned wood means the fire spends much of its energy boiling off water, lowering the firebox temperature. This produces more smoke (unburned hydrocarbons), which, in turn, increases flue condensation and accelerates creosote formation. It takes a lot of energy to turn liquid water into steam. The latent heat of vaporisation is about 2.26 MJ per kilogram of water, plus extra energy to heat that water up to boiling temperature.
So if your logs contain a lot of water, a lot of your fire’s energy is diverted away from clean combustion. That pushes the burn towards cooler flames, more CO and soot, more tar in the smoke, and more deposits in the chimney.
2) Slumbering / smouldering the stove (low air, low flame)
Running a stove low and slow for long periods, especially with restricted air, often creates incomplete combustion, resulting in smoky exhaust, higher tar output and faster creosote build-up. This is particularly common overnight or when trying to make the wood last, known as slumbering.
3) A cold or oversized flue
A cool chimney encourages condensation. Causes include external chimneys exposed to cold air, uninsulated liners, oversized flues that slow the velocity of hot gases, poor chimney design and poor matching of the chimney to the stove.
4) Lack of sweeping and inspection
Even with good burning techniques, some deposits are normal. Without regular sweeping, those deposits accumulate and eventually become fuel.
5) Over-firing or sudden high heat
A chimney loaded with creosote might sit quietly for months, until one day you burn a particularly hot fire, open the air too much, or experience strong wind-driven draft. Flue temperatures rise sharply, and deposits ignite.
The proactive prevention plan: clean chimney + clean burn + clean fuel
1) Proactive chimney sweeping: one of the best things you can do.
Sweeping removes soot/creosote before it becomes thick enough to ignite. It also identifies early warning signs such as cracks, failing liners, bird nests, and blocked terminals. A sweep also checks that the appliance is drafting properly, helps keep emissions and odours down and improves efficiency and reduces maintenance issues.
You should have your chimney swept pre-season (early autumn), mid-season (mid-winter) and at the end of the season (mid-spring), ideally. The exact recommendation varies depending on how much you use your stove.
A good sweep and inspection of your chimney should include sweeping the full flue pathway, not just what’s easy to reach, checking the stove, baffle plates, and flue pipe joints, assessing deposit type (fluffy vs crunchy vs glazed), checking for blockages or nests and looking for signs of overheating or liner failure. A chimney sweep may also advise on fuel quality and burning techniques, especially if they notice issues, such as burning wet wood or burning inappropriate materials, such as rubbish or treated wood.
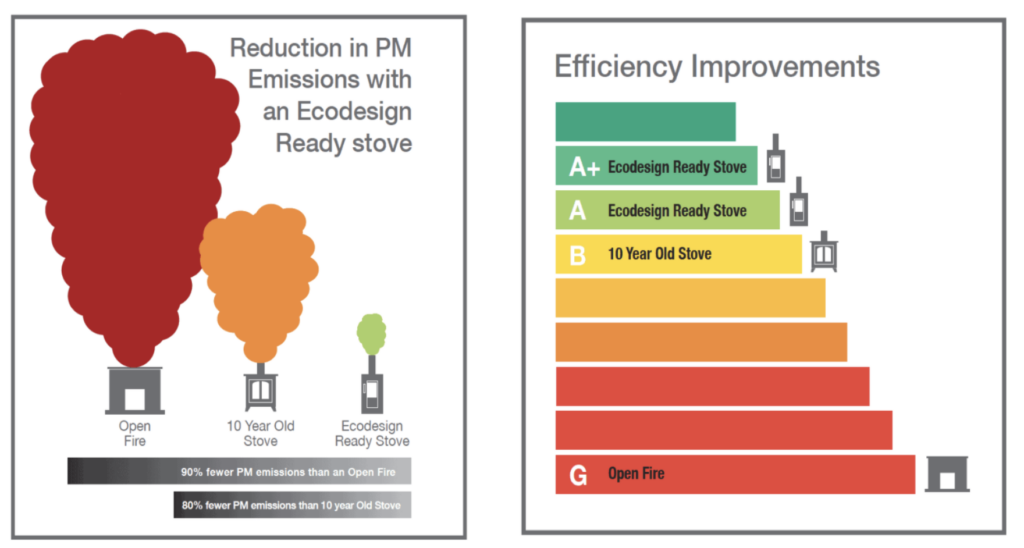
2) Ecodesign stoves: why modern combustion technology reduces creosote risk
Ecodesign stoves are designed to meet stricter efficiency and emissions requirements than older appliances. The engineering goals of Ecodesign mean more complete combustion, fewer particulates, lower CO emissions, and higher efficiency. A cleaner burn typically means fewer unburned organic vapours leaving the firebox, fewer soot particles produced with less sticky tar available to condense on flue walls, and less rapid creosote accumulation.
Ecodesign stoves improve combustion by optimising air staging and mixing. Design features include:
Secondary air / tertiary air injection – Preheated air is introduced above the main fire to burn gases that would otherwise leave as smoke.
Hotter, better-insulated combustion zone – Maintaining higher temperatures helps oxidise tars and CO into CO₂ and water vapour.
Longer residence time – Baffles and internal pathways keep gases in the hot zone longer, increasing the chance they fully burn.
More stable air control – Better control can reduce the temptation (and the ability) to run the stove in a heavily smouldering state.
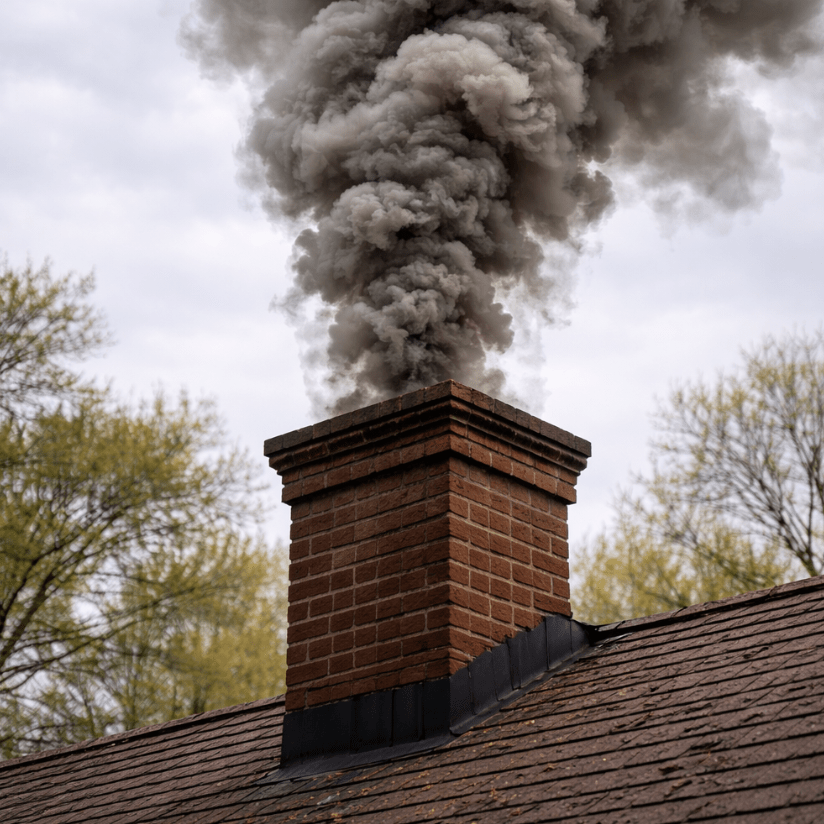
The result is a different chimney output: when burning properly, you should see little to no visible smoke once the stove reaches temperature.
An Ecodesign stove does not cancel out poor burning habits. If you burn wet wood or continuously slumber the stove, you can still create creosote quickly, even with an advanced combustion design. Ecodesign helps, but it works best paired with the right fuel and operation.
3) Burning only seasoned wood:
What counts as seasoned?
In practical terms, seasoned firewood is wood that has been dried to a moisture content of about 20% or lower, often measured on a typical handheld moisture meter.
How to measure moisture correctly:
a. Split a log
b. Test the freshly exposed inner face, not the outside.
c. Take a couple of readings across different logs.
d. Aim for 20% or less. But avoid extremely low moisture levels (10% or less), as the wood will burn too quickly and produce a fierce flame, which can risk chimney damage.
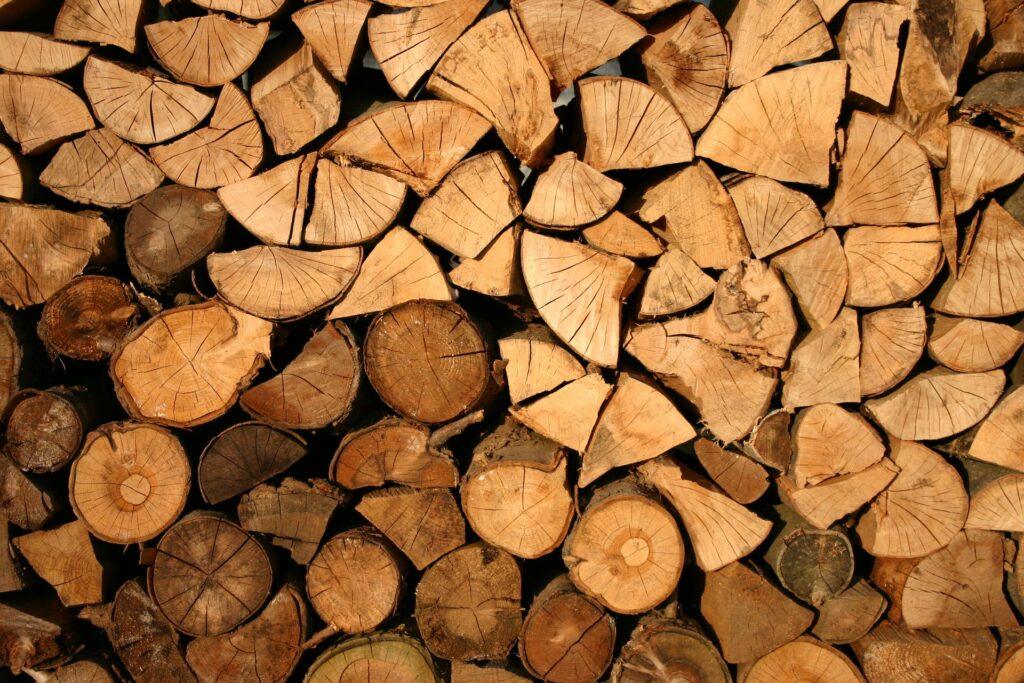
Storage: Seasoning is mostly about airflow and time:
a. Split logs to expose internal surfaces
b. Stack off the ground
c. Keep the top covered (rain protection)
d. Keep the sides open (airflow)
e. Store in a sunny/windy location if possible.
A common mistake is fully wrapping stacks in plastic or keeping them in airtight spaces, this traps moisture and slows drying. Car garages are not ideal for storing wood due to the fire risk.
Burning technique: how to run your stove to avoid creosote
Start hot: establish a strong flame early to warm the flue quickly. Avoid prolonged smouldering: don’t run the stove with very low air for long periods unless the appliance is designed and tested for that mode.
Use the right log size: oversized logs can force low-air, smoky burning. Refuel onto a hot bed of embers and let the new load ignite quickly.
Check your flame: a lazy, orange, smoky flame often indicates poor combustion. A more active flame and clearer glass often indicate cleaner burning. Not always, but it’s a useful clue. Consider a flue thermometer: it can help you avoid both smouldering (too cool) and over-firing (too hot), keeping your appliance within its recommended range.
Warning signs that creosote is building up
Catching problems early is part of being a proactive stove user. Watch for a strong tar/campfire smoke smell near the stove or outside near the chimney. Black, sticky residue around the stove joints or the flue collar is a sign, as is tar dripping from the chimney or staining on the exterior masonry. Other signs include persistent visible smoke once the stove is hot, along with glass sooting up quickly despite using good fuel. Poor draft, smoke spillage into the room, and more frequent difficult start-ups are also subtle signs.
These signs don’t always mean an imminent chimney fire, but they do mean your system is producing and/or retaining more deposits than it should.
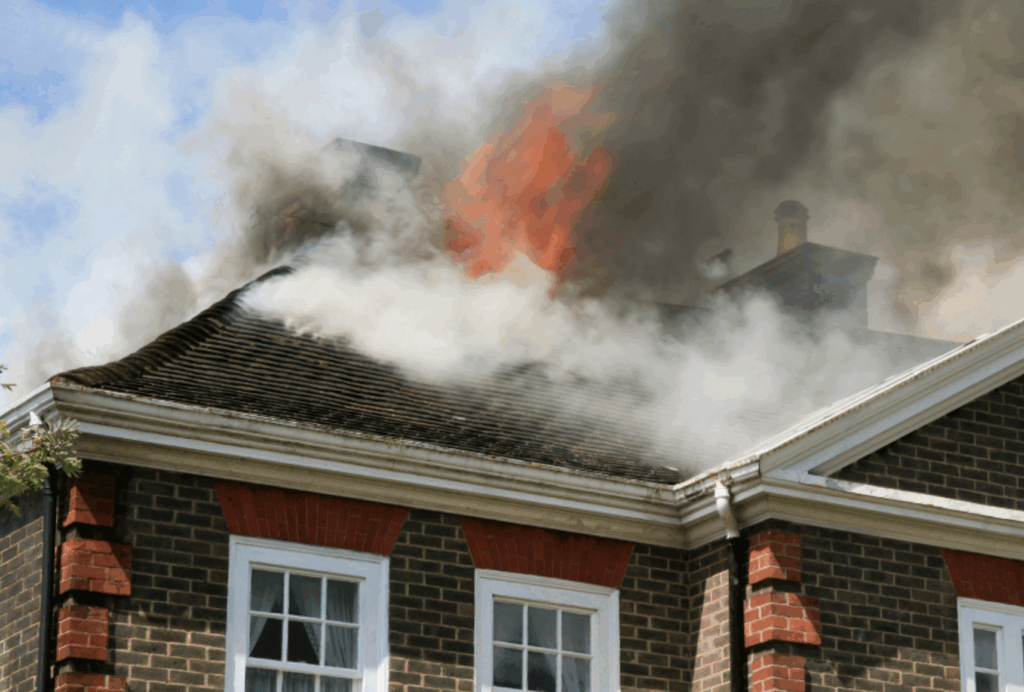
What to do if you realise you have a chimney fire
If you suspect a chimney fire, treat it as an emergency. Even if it seems contained, the temperatures inside a flue can become high enough to crack liners, ignite surrounding structural materials or push fire into roof spaces.
Common signs of a chimney fire
A loud roaring or rumbling sound, often described as like a freight train. Vibrations in the stove pipe or chimney. An intense, hot smell (burning tar), visible sparks or flames from the chimney top, dense smoke, or sudden changes in draft are all signs that something isn’t right.
Immediate step-by-step actions
1. Call 999 immediately. Don’t wait and see. If it’s a chimney fire, you want a response early.
2. Get everyone out of the house. Evacuate people and pets. Close doors behind you as you leave.
3. If safe to do so, shut down the stove’s air supply. Close primary/secondary air vents. Close the damper (if fitted). Close the stove door securely. The goal is to reduce oxygen feeding the fire.
4. Do not pour water into the stove or fireplace. Rapid steam generation can be dangerous, and sudden thermal shock can crack stove components and liners.
5. If you have a purpose-made chimney fire suppressant, use it only if you can do so safely and exactly as directed. Some products are designed to release fire-suppressing powders into the flue. These are not a substitute for calling emergency services.
6. Stay outside and monitor for signs of spread.
Tell the fire service what appliance you have, when it was last swept, whether you’ve noticed heavy tar, and where the chimney runs through the building.
If smoke or CO (Carbon Monoxide) is a concern
Chimney fires can affect draft, pushing smoke or carbon monoxide into living spaces. This is another reason evacuation is important, and why working CO alarms are a must in homes with solid-fuel appliances.
Symptoms of Carbon Monoxide poisoning:
a. Dull headache
b. Weakness
c. Dizziness
d. Nausea or vomiting
e. Shortness of breath
f. Confusion
g. Blurred vision
h. Loss of consciousness
Carbon monoxide (CO) poisoning can be deadly. It’s especially deadly as it can’t be seen, tasted or smelt, and some symptoms are very similar to a virus or hangover.
After a chimney fire:
Even if the fire seems to go out on its own, do not use the stove again until a competent professional has inspected the entire system.
A post-fire inspection should look for cracked or displaced liners, damaged flue joints, warped stove components, compromised masonry, heat damage to nearby timbers, and heavy remaining deposits. Chimney fires often leave behind more fragile, flaky deposits and can expose hidden weaknesses. Continuing to use a damaged flue can significantly increase the risk of a house fire.
Chimney fires are usually the final step in a chain that starts much earlier: wet fuel, cool inefficient burns, and deposits left to build up. The proactive approach is straightforward and highly effective:
a. Sweep regularly so fuel for a chimney fire never gets the chance to accumulate.
b. Burn only seasoned wood so you’re not forcing the stove into smoky, tar-producing combustion.
c. Choose and use an Ecodesign stove, and operate it correctly, to reduce smoke and unburned tars at the source.